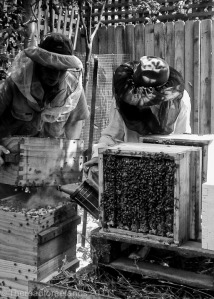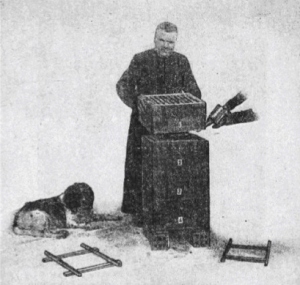
Abbé Émile Warré, checking 'The People's Hive' with his friend, the cocker spaniel 'Polo' - Photo from "Beekeeping for All"
Abbé Émile Warré (1867-1951) was a beekeeper in France during the late 1800′s and early 1900′s. Over 30 years of his time, as an apiarist, was spent studying 350 different hives of different systems, leading to the eventual development of ‘The People’s Hive’ (now often referred to as the ‘Warre’ hive). His book ‘Beekeeping for all’ was translated into English by Patricia and David Heaf in 2007 allowing non French speaking people to gain access to this wealth of knowledge.
It is suggested in ‘Beekeeping for all’ that it is unwise for a novice to experiment with different hive types, as 10-12 hives are required per type, which should careful be observed over 10 years to gain a real grasp on the functionality of each. Having considered this I read a little on each type of system currently being used in Australia and decided that ‘The People’s Hive’ should suit my purpose well.
I found that the main restriction with The People’s Hive/Warré system here in Australia is that it has only recently been adopted by a scarse few commercial apiarists, this may be due to the only recent translation of ‘Beekeeping for all’. However, during my university holidays I was lucky enough to find and attend a natural beekeeping course run by Tim Malfroy of Malfroy’s Gold, which was based on the Warré system. This then lead to the building of two hives. I found the Warre construction guide at the beespace invaluable to the building of my hives and generously provided for free. I had an issue though. I wanted hive components that I hadn’t seen for sale before, in particular hive boxes with observation windows and I didn’t want to spend a fortune on them.
The Design
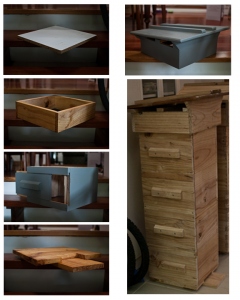
The People’s Hive comprises of a base, hive boxes, top-bar removable frames, a quilt box and a roof. The hives here are made from radiata pine due to its affordability and weight. The closest measurement to Warre’s 20mm thick timber in Australia is 19mm thick boards with a width of 240mm. As long as you can achieve dimensions close to this it doesn’t matter if you go a little thicker or wider.
The dimensions for the images at left are listed below (L) – Length, (w) Width, (d) Depth:
The base (floor) – 1 x Bee landing board 420(L) x 160(w), 1 x floor plate 350mm x 350mm (this could be cut out of 2 pieces and sits on top of the landing board), 2 x short legs 210 x 30 (these legs are screwed/nailed parallel to the land board to join the two base plate pieces and create a more stable floor. The landing board protrudes 70 x 160 mm out the front of the base and the entrance gap for the bees is 120 (w) x 40 (d). This entrance is decreased during summer with a board and an opening cut 120 (w) 15 (d). During winter another board can be installed, this will have a gap cut 70 (w) x 7.5 (d) to prevent rodents entering the hive.
The hive boxes – I have added observation windows to my hives because I would love to be able to check the bees and show friends and family without opening the hives. I have seen other designs, however, I had the tools available to build slide window covers. If you would like to build standard hive boxes a lot less equipment is needed and you should ignore the sliding window.
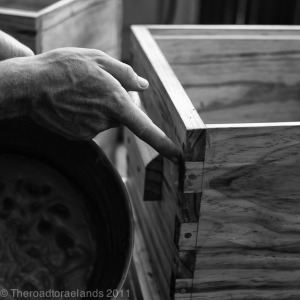
For the standard hive box you simply need 2 x 240 (w) x 19(T) pine boards that measure 310 (L) and 2 that measure 350 (L) (external measurements on all components except the roof will measure 350×350). The short sides need to have a rebate cut into the top of them 12mm (w) x 11mm (d) to allow the top bars to sit on them (This is for Australian timber sizes). Note: see photo below, the short side with the rebate is butted against the long side. This leaves adequate room for 8 frames in each hive box. The short sides can then be glued and fastened with screws or nails to the long sides. 2 x short handles should also be screwed to the sides that run parallel to the frames (the sloped top of the handles allows water run-off).
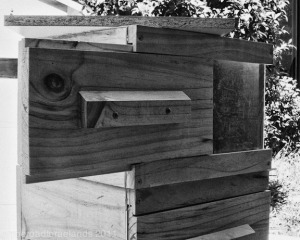
Windowed hive boxes – I came up with the window design after seeing similar ideas. However I decided to use a router and rebate the window covers to create a sliding action that would allow no light into the hive unnecessarily, it would make the hive look neat and would allow me to attach handles to the windows that could withstand lifting on the side that looks onto the frame sides. The basic measurements and items in addition to the standard hive boxes are:
240 x 350 x 3mm(T) perspex sheeting per hive (must be drilled and screwed), enough timber for a window cover 190 (w) x 350 (L) and 2 window slide frames 40 (w) x 350 (L) (Leave a gap when rebating the windows to allow for swelling). The window is only on one side of the hive box and by having it rebated has allowed me to put one window on each hive box looking side on to the frame (the handle side), whereas other designs I have seen only allow you to look at the ends of the frame.
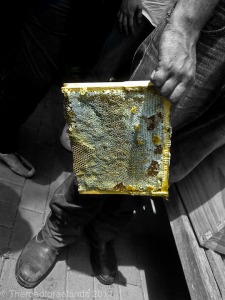
I am yet to test this design and I hope that the orientation of the window is ok. My main worry is that there will be too many bees to see the comb from a side aspect.
The Quilt box – The quilt boxes external measurements are 350 (L) x 350(w) x 100 (h). Its sole purpose is to be filled with straw or sawdust to allow any condensation in the hive to pass into it and become absorbed rather than dripping on the bees. It should be fitted with a single layer of fly/insect mesh on its underside so that the bees can’t chew into the box. Below the quilt box will also sit a single layer of hessian on top of the hive box (not seen in the components photograph), this hessian square allows the beekeeper to gently observe the hive.
Quilt box board – This board is a simple square board that sits on top of the quilt box 350 x 350 x 10 (t) to protect its content from moisture, rodents, etc. If you use a piece of white coated, weathertex type board you can write down your hive observations each time the hive is opened (Use permanent marker).
The hive roof – The gabled hive roof construction can be found at the beespace construction guide, however I decided to build one sloping roof for interests sake. I used the design in ‘Beekeeping for all’ and found it quite easy to construct. The roof top dimensions are 1000 x 1000 x 19 (t). The 2 sides measure 360 (L) x 150 (w) – This depth is useful to keep in mind as it ensures the quilt box and some of the top hive box is covered by the roof frame. The lowest end piece is 400 (L) x 150 (w) and the high end piece is a little more tricky as it is 150 (w) x 400 (L) until having to spread out to meet the edges of the roof top (this creates the slope). I angled and raised it 60mm higher, which seems like a good angle to shed water. The final step to finish is a couple of boards spanning across the frame but below the roof (these boards sit on top of the board above the quilt box, they also make the roof sit level.
Timber treatment – I treated my hives with a 15:1 linseed oil beeswax mix heated to 75·C and painted on. You could stop at this stage or you could also treat the hives with two coats of low sheen, low toxic paint.
Well I hope I have been somewhat clear about my slightly modified design of ‘The Peoples Hive’. This hive is not at all different in function from Warré’s original, however it is simply adding some modern touches to make observation a little less disturbing for the bees. If you would like more information on natural beekeeping there are some great websites and blogs around, such as The Barefoot beekeeper, ‘beekeeping for all’ , The natural beekeeping trust, natural beekeeping blog, bee natural, A year with Warre hives. If you live in Australia and are interested in attending a course check out Malfroy’s Gold, as Tim is one of few commercial Warré hive apiarists in Australia. I found the course to be interesting and practical and without attending it I feel that I wouldn’t hold the skills or confidence to give ‘natural’ beekeeping a go.
Keep checking in for more news on our bee progress ![]()
“Therefore go, my People’s Hive, go into all the gardens of France (or Australia). Go and give the children some nourishing sandwiches, and give the grown ups well being in body and mind. Go and remind everyone of the necessity of work, the gentleness of unity, the beauty of devotion, the prosperity of countless families. Go and fill every fireside with honey and happiness” Abbé Émile Warré
